
Ultimate Guide to Rocky Mountain National Park
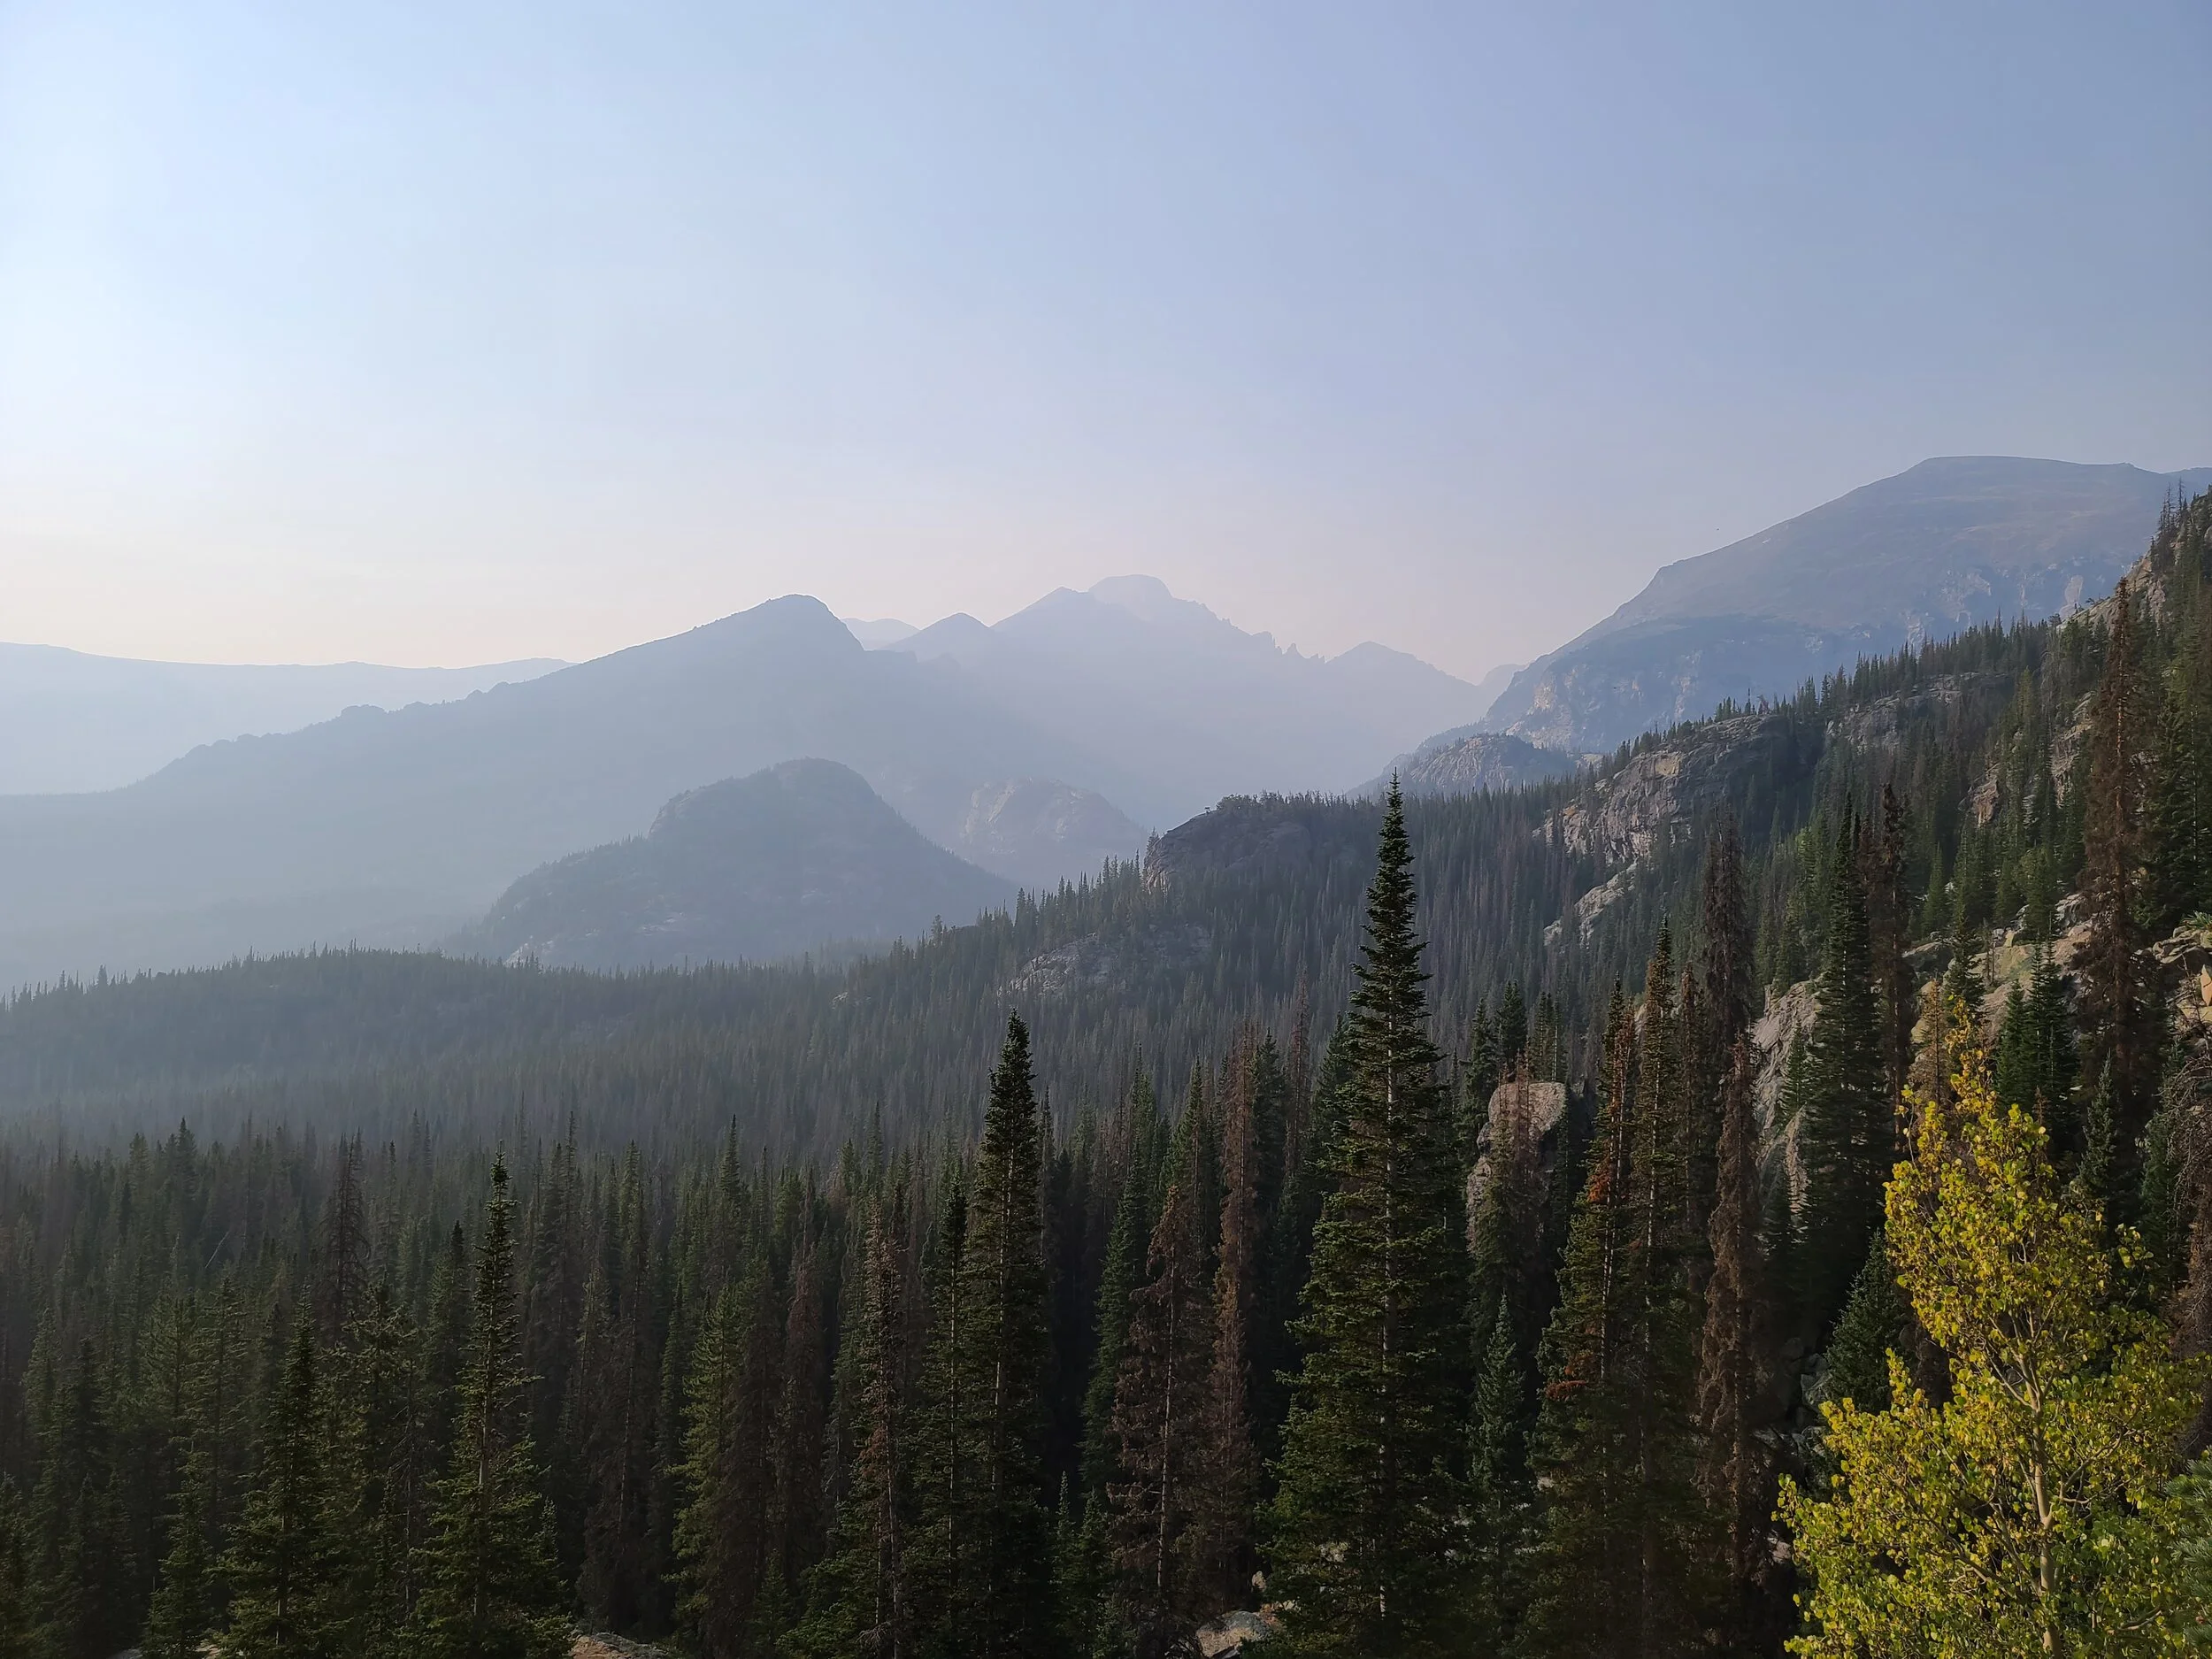
Rocky Mountain has almost 250,000 acres to explore spanning across the Continental Divide in Colorado. With mountains, forests, rivers, waterfalls, and alpine tundra, this park has something for everyone.
In this guide to Rocky Mountain National Park, I’ll cover everything you need to know to plan a perfect trip based on my experience visiting the park.
Let’s get started!
Rocky Mountain National Park Basic Information
Rocky Mountain is open 24/7 every day of the year.
There are 4 Visitor Centers:
Alpine Visitor Center which is located along Trail Ridge Road is only open from late spring through mid-fall.
From May 29 - June 12 the visitor center is open from 10:30am - 4:30pm
From June 13 - October 11 the visitor center is open from 9:30am - 4:30 pm
From October 12 - May 28 the visitor center is closed
Check that Trail Ridge Road is open before trying to visit.
Beaver Meadows Visitor Center is located near the entrance coming from Estes Park along HWY 36. The visitor center is open all year, except Thanksgiving and Christmas day.
From November 1 - February 28 the visitor center is open 9:00am - 4:30pm
From March 1 - May 21 the visitor center is open 8:00am - 4:30pm
From May 22 - October 31 the visitor center is open 9:00am - 6:00pm
Fall River Visitor Center is located near the entrance coming from Estes Park along HWY 34. The visitor center is open 9:00am - 5pm everyday except Thanksgiving and Christmas Day.
Kawuneeche Visitor Center is located near the Grand Lake entrance.
From November 1 - May 21 the visitor center is open 9:00am - 4:30pm and is closed Mondays and Tuesdays.
From May 22 - October 31 the visitor center is open 9:00am - 5pm.
The visitor center is closed Martin Luther King Jr. Day, Washington’s Birthday, Thanksgiving, and Christmas day.
Park fees are $35 per vehicle which is valid for 7 days or $25 per vehicle for a single day. If you’re planning on visiting multiple national parks an annual pass can be purchased for $80 and gives you access to all Federal fee areas for one year.
From May 28 - October 11 a timed entry permit is required to enter the park. The permit is free, but has a $2 processing fee. There are two permit options:
Bear Lake Road Corridor which includes the rest of the park from 5:00am - 6:00pm
Park access excluding the Bear Lake Road Corridor from 9:00am - 3pm.
Permits go on sale online the first day of the month for visits for the following month starting at 10:00am. Example: on May 1st at 10:00am tickets from June 1 - June 30 go on sale. There will also be permits released at 5pm to purchase to visit the park the next day. These tickets sell out very quickly, so I recommend getting the tickets as soon as possible.
You must enter the park, and Bear Lake Road Corridor, if applicable during your permit time slot to receive a pass that will let you enter and exit for the rest of the day.
There are 3 shuttle options to access the Beak Lake Road corridor, which are helpful during the summer months as parking at the trailheads is limited.
The Hiker Express Route takes you from the Estes Park Visitor Center to the Park & Ride. Note, this is not running for the 2021 season.
The Bear Lake Route makes stops at the Park & Ride, Bierstadt Lake Trailhead, Glacier Gorge Trailhead, and Bear Lake.
The Moraine Park Route makes stops at the Park & Ride, Sprague Lake/Glacier Creek Stables, Hollowell Park, Tuxedo Park, Moraine Park Campground (C Loop), Cub Lake Trailhead, and Fern Lake Bus Stop.

Top Hikes to do in Rocky Mountain National Park
Bear Lake Corridor:
Trekker Tip: A permit is required in the summer to visit this part of the park. Plan ahead to make sure you don’t miss out!
Trekker Tip: Elevations in the park range from 7,800’ to 14,259’. If you are coming from lower elevations, give yourself at least a day to get acclimated to the altitude to avoid getting altitude sickness. If you start to experience symptoms of altitude sickness, descend at least 1,000’ - 1,500’, or more, as soon as possible.
Dream Lake
Distance: 2.2 miles roundtrip
Difficulty: Easy
Elevation Change: 425 ft
Trailhead Access: Bear Lake Trailhead. There is a small parking lot, and if you don’t arrive early, plan at parking at the Park & Ride and taking the Bear Lake Route shuttle.
Duration: 1 hour
From the Bear Lake trailhead, start up the slight incline through aspens and pine trees. About half a mile into the trail you’ll pass by Nymph Lake. Another half mile and you’ll reach Dream Lake.
Emerald Lake

Distance: 4.1 miles roundtrip
Difficulty: Moderate
Elevation Change: 744 ft
Trailhead Access: Bear Lake Trailhead. There is a small parking lot, and if you don’t arrive early, plan at parking at the Park & Ride and taking the Bear Lake Route shuttle.
Duration: 2-3 hours
Continue past and around the north side of Dream Lake for another mile and head up the steady incline. You’ll hike through a pine forest to reach this alpine lake. This will take you closer to the Flattop Mountain than the hike to Dream Lake.
We did this hike in the summer and got up early to hike this before sunrise. It was fairly cold early in the morning, so packing layers was a must as after sunrise the temperature began to climb. There were plenty of spots at the lake to find a seat and enjoy the sunrise. The wind coming across the lake can be strong at times, so also be prepared for slightly colder weather from the wind.
Trekker Tip: This is one of the best places in the park to take in the sunrise. Plan to get to the park early, and get a permit if required, and give yourself at least 30 minutes to get up to Emerald Lake to find a spot for sunrise.
Nymph Lake

Distance: 1.1 miles roundtrip
Difficulty: Easy
Elevation Change: 245 ft
Trailhead Access: Bear Lake Trailhead. There is a small parking lot, and if you don’t arrive early, plan at parking at the Park & Ride and taking the Bear Lake Route shuttle.
Duration: 30 minutes - 1 hour
Located along the trail to Dream Lake and Emerald Lake is Nymph Lake. Start the trail with a slight incline through aspen and pine trees. After about half a mile you’ll reach the lake. On a clear day, you can catch a glimpse of Longs Peak, which is the highest mountain in the park. When we visited the lake was covered in pond lilies which made it a nice little spot to stop and enjoy the views.
Bear Lake
Distance: 0.8 miles roundtrip
Difficulty: Easy
Elevation Change: 45 ft
Trailhead Access: Bear Lake Trailhead. There is a small parking lot, and if you don’t arrive early, plan at parking at the Park & Ride and taking the Bear Lake Route shuttle.
Duration: 30 minutes
Hike counter-clockwise along the trail to hike around the lake. There are numerous pine trees and aspens along the trail along with many places to stop along the shoreline. This makes it a great place to enjoy a picnic lunch.
Alberta Falls

Distance: 1.2 miles roundtrip
Difficulty: Easy
Elevation Change: 160 ft
Trailhead Access: Glacier Gorge Trailhead. There is a very small parking lot, and if you don’t arrive early, plan at parking at the Park & Ride and taking the Bear Lake Route shuttle.
Duration: 30 minutes - 1 hour
Start up some stairs and cross over two bridges going across the creeks. After about a quarter of a mile, the trail will split, and take the left route towards Alberta Falls. Pass through numerous aspen trees that line the trail to arrive at Alberta Falls. This 30ft waterfall is a great place to stop at and have a picnic.
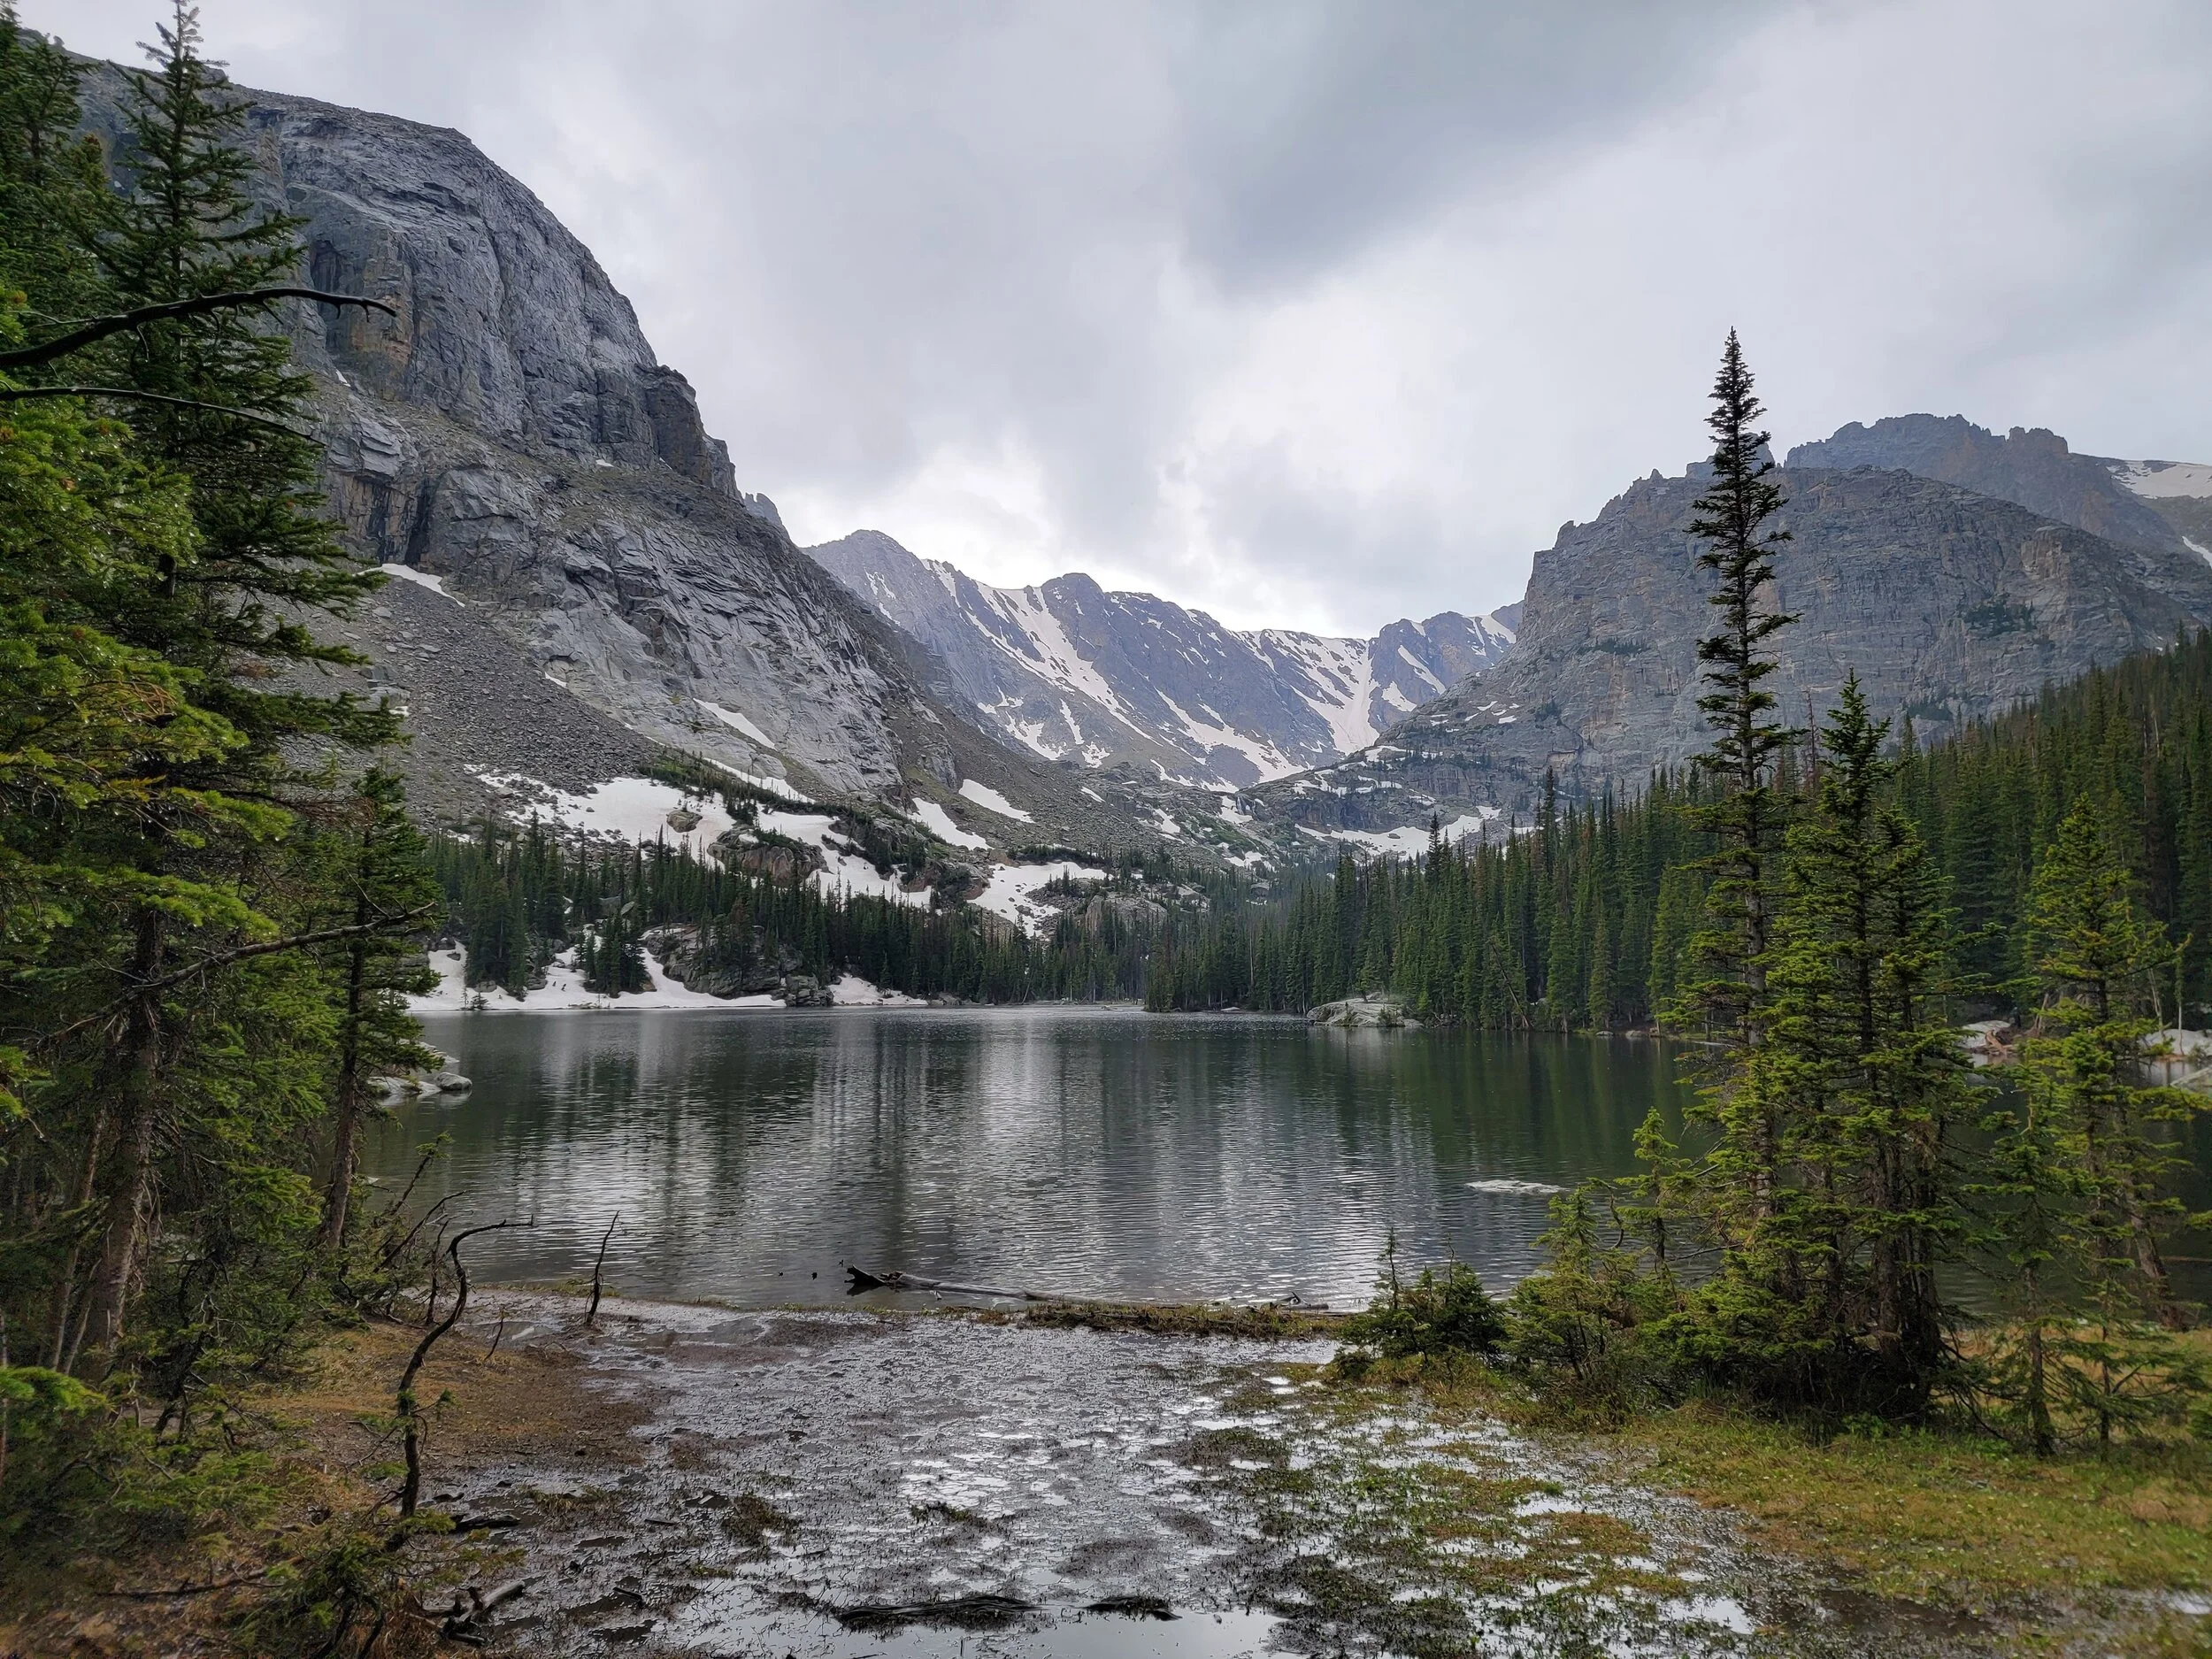
The Loch
Distance: 5.4 miles roundtrip
Difficulty: Moderate
Elevation Change: 940 ft
Trailhead Access: Glacier Gorge Trailhead. There is a very small parking lot, and if you don’t arrive early, plan at parking at the Park & Ride and taking the Bear Lake Route shuttle.
Duration: 3 hours
From the Glacier Gorge Trailhead, continue past Alberta Falls. Continue down the trail until you reach another junction and take a right along the path towards Loch Vale. Continue up the switchbacks and though an impressive gorge to reach The Loch. You can also continue along the trail towards Sky Pond to walk around the lake. From the lake you will have views of Taylor Peak and Taylor Glacier. This is also a great spot for fishing in the park.
We visited in mid-June and there was still quite a bit of snow on the ground when we reached The Loch. If continuing around the lake early in the season, be prepared with hiking poles and micro spikes.
Sky Pond
Distance: 9.8 miles roundtrip
Difficulty: Strenuous
Elevation Change: 1,650 ft
Trailhead Access: Glacier Gorge Trailhead. There is a very small parking lot, and if you don’t arrive early, plan at parking at the Park & Ride and taking the Bear Lake Route shuttle.
Duration: 5+ hours
Continue past The Loch and the trail will steepen again. After about three quarters of the mile, the trail will split and continue towards the left to Sky Pond. Continue along the trail for another half mile until the reach the base of Timberline Falls.
From here, I’m not sure if the correct term is hiking or if this switches to mountain climbing as the trail sign points upwards towards the falls. This is the most challenging part of the hike as you climb roughly 200ft in just 0.15 miles. Many people will choose to turn back here, and it is not recommended that you continue past here with small children or if you have a fear of heights or if inclement weather is starting to roll in.
The first part of the climb up the waterfall is the hardest. If you can get past that first point, you’ll likely be ok. Overall, it isn’t super dangerous, but you must be extra careful on this portion of the trail. When we visited we did witness someone fall down as they attempted to descend this section, but thankfully they did not fall far and were ok.

Once you reach the top of the waterfall, take a deep breath as the hardest incline is over. After reaching the top, you will see the Glass Lake. Don’t be fooled, this is not Sky Pond, but you’re almost there! Climb up the rocks to the right to find the trail and continue around Glass Lake for just under half a mile to reach Sky Pond.

Once you reach Sky Pond, find a nice place to sit, eat lunch, and enjoy the sites of the pond along The Sharkstooth backdrop. When we visited there were also several marmots at the pond.

Trekker Tip: Start this trail early as Colorado mountains are prone to have afternoon thunderstorms. If a storm is approaching, turn around and head back towards the trailhead. When we visited a storm started forming right after we started our descent from Sky Pond. This storm quickly turned into a hail storm and there were not any good places to find shelter.
Trekker Tip: If doing this trail early in the spring/summer season, expect to encounter plenty of snow on the trail. We definitely recommend to bring hiking poles with snow baskets along with micro spikes to be safe along the trail. When covered in snow, the trail can also be hard to find sometimes. Download a trail map ahead of time and follow other hikers footsteps to keep along the trail.
Outside Bear Lake Corridor:
Twin Sisters Peak
Distance: 7.4 miles roundtrip
Difficulty: Strenuous
Elevation Change: 2,338 ft
Trailhead Access: Twin Sisters Trailhead
Duration: 4+ hours
A relatively steep hike that takes you to 11,428ft to the top of Twin Sisters Peak. At the summit, you’ll be rewarded with stunning views of Longs Peak, Mt. Meeker, and the Continental Divide.
Longs Peak
Distance: 16 miles roundtrip
Difficulty: Strenuous
Elevation Change: 4,885 ft
Trailhead Access: Longs Peak Ranger Station
Duration: 10+ hours
Long’s peak is the only 14er located within Rocky Mountain National Park. Sitting at 14,259’, you’ll have to follow a long and strenuous trail with some scrambles to reach the summit. At the top, you’ll have views across all of Rocky Mountain.
If visiting in spring or early summer, be prepared to still encounter snow on the trail, so come prepared with hiking poles and micro spikes.
Ouzel Lake
Distance: 9.8 miles roundtrip
Difficulty: Strenuous
Elevation Change: 1,510 ft
Trailhead Access: Wild Basin Ranger Station
Duration: 5+ hours
Along the hike to Ouzel Lake, you’ll pass by Copeland Falls, Calypso Cascades, and Ouzel Falls. Ouzel Lake sits at 10,020ft and is one of the best fly-fishing destinations within the park. The lake is catch-and-release only and known for it’s native greenback cutthroat trout.
Cascade Falls
Distance: 7.0 miles roundtrip
Difficulty: Moderate
Elevation Change: 300 ft
Trailhead Access: North Inlet Trailhead
Duration: 3-5 hours
Cascade Falls is a multi-tiered waterfall that drops about 50ft through a narrow granite chute. The falls is surrounded by evergreen trees and has a nearby meadow. This is a good place to view wildlife such as moose and elk.
Top Scenic Drives to do in Rocky Mountain National Park
Drive Trail Ridge Road
48 mile road that connects Estes Park and Grand Lake that climbs over 4,000 ft and reaches up to 12,183ft in elevation. Known as the “Highway to the Sky”, driving this road is one of the best ways to get views across the entire park as you cross over the Continental Divide. This road is also known for being the highest continuous paved road in the nation. There are numerous pullouts along the road where you can stop and take in theses views.
The road is only open from Memorial Day through mid-October when the road is cleared of ice and snow. If temperatures fall below freezing over night, there is potential for the road to close temporarily.
When visiting, we recommend starting early as the road can become crowded with other drives, tour buses, and RVs normally starting around 10am. Plan to spend anywhere between 1.5 to 4 hours driving this road depending on traffic and how long you want to stop at the pullouts.
Drive Old Fall River Road

The 11 mile gravel road was opened in 1920. The road is one-way only and runs uphill. The road features numerous switchbacks, making the speed limited to 15 mph. There are no guard rails along the road, but if you take the drive slowly, the road itself is safe and does not require 4WD. This is a great drive to do to be more immersed in nature than your typically concrete road. You’ll pass by pine forests and waterfalls along the drive.
This is a seasonal road that is usually open from early July to early October when the road is clear of ice and snow. The end of the road meets up with Trail Ridge Road a the Alpine Visitor Center. Plan to spend 1 hour driving the road due to the slow speed limit.
Additional Things to do at Rocky Mountain National Park
Climbing
Opportunities for climbing exist in many areas across the park including Lumpy Ridge and Longs Peak. You can choose from a range of climbing experiences from bouldering for a couple of hours through multi-day big wall experiences.
Day use does not require a permit, but if you are attempting a multi-day climb, are climbing more than 3.5 miles from a trailhead, or are doing 4 or more technical pitches, a bivouac permit is required.
Fishing
Opportunities for fishing are available at many of the lakes in the park. The only trout native to the park is the greenback cutthroat and the Colorado River cutthroat. Other fish that currently exist in the park at brown, brook, rainbow, and cutthroat trout.
Some of the best places to fish in the park are:
Along the West Side: Baker Creek, Onahu Creek, and Spirit Lake
Along the East Side: Black Lake, The Loch, Sprague Lake, Ouzel Lake, Roaring River, and Mill Creek
A valid Colorado fishing license is required for all persons 16 years or older to fish in the park, but no permit is required. There are special regulations that exist, so check the park website before you go to make sure you obey all regulations.
Horseback Riding
There are approximately 260 miles of trails that are open to commercial and private horse use within the park. There are two stables in the park located at Glacier Creek Stables and Moraine Park Stables.
All stock must remain on existing trails and are not permitted in picnic areas and drive-in campgrounds.
Bicycling
Bicycling in the park is a great way to take in the views of the park. Cyclists must only ride single file at all times and should stay towards the right side of the road. E-bikes are allowed anywhere in the park where vehicles are allowed.
A permit is required to do a group ride if your group exceeds 25 riders.
Check out the nearby town of Estes Park
This is the gateway to Rocky Mountain National Park and where most people choose to stay. It has all the amenities you need for your trip while embodying the spirit of a mountain town.
Here you can find guides and equipment for hiking, camping, cycling, rock climbing, fishing, stand up paddle boarding, white water rafting, and more.
Estes Park is a great town to explore while you get acclimated to the elevation or want a break from hiking. There are numerous restaurants to dine at, a Christmas shop, locally made saltwater taffy, gift shops and more.
Nearby Whitewater Rafting
While there is no whitewater rafting inside Rocky Mountain National Park, there are lots of options for whitewater rafting nearby. Popular rafting spots are through the Poudre River or Colorado River.
Choose between shorter, calmer half-day trips through more extreme full-day trips or anywhere in between. Nearby outfitters offer adventures for all ages and abilities.
Where to Stay
Lodging in Rocky Mountain National Park:
There is no lodging with Rocky Mountain National Park.
There are 5 campgrounds within the park to choose from:
Reservable campgrounds: Aspenglen, Glacier Basin, and Moraine Park
First-come, first-served campgrounds: Long Peak and Timber Creek
Campground fees are $20/night in the winter and $30/night in the summer. Group sites range between $40/night - $60/night depending on site size.
Options include several drive-to sites for tents and RVs and more secluded walk-to tent sites.
We have stayed in the Glacier Basin campground, which was conveniently located in the Bear Lake Corridor across the road from the Park & Ride. New evergreen trees have been planted in the campground when the older trees were removed due to damage from beetles. Because of the new trees, there is not much privacy between camp sites, but there are good views of the nearby mountains. The campground also had relatively nice flush toilets.

Lodging in Estes Park:
Estes Park is near the east entrance of Rocky Mountain National Park and is considered the gateway to Rocky Mountain National Park. This is where most people choose to stay as it has all the amenities you need for your trip while embodying the spirit of a mountain town. It offers a variety of cabins, hotels, motels, and RV parks. Popular places to stay are:
River Spruce Cabins
Fall River Village Resort
The Ridgeline Hotel Estes Park
Best Western Plus Silver Saddle Inn
Swiftcurrent Lodge on The River
YMCA of the Rockies - Estes Park Center
The Stanley Hotel
This is the hotel that inspired Stephen King’s The Shinning and was used as a filming location. In addition to hotel rooms, the hotel also offers hotel tours.
Lodging in Grand Lake:
Grand Lake is near the west entrance of Rocky Mountain National Park and is the best area for lodging if coming from the west. Popular places to stay are:
Grand View Mountain Lodge
The Historic Rapids Lodge
Columbine Cabins
The Gateway Inn
Where to Eat
Dining in Rocky Mountain National Park:
There is only one restaurant inside the park which is open from late May through early October. The Trail Ridge Store is located adjacent to the Alpine Visitor Center along Trail Ridge Road and includes a café and coffee bar.
Dining in Estes Park:
Seasoned is an upscale American bistro in a relaxed atmosphere.
The Rock Inn Mountain Tavern is an American restaurant with a woodsy feel featuring live music.
Boss Burges and Gyros offers burgers, sandwiches, gyros, and hot dogs.
Dining in Grand Lake:
One Love Rum Kitchen is a Caribbean eatery that features Caribbean inspired sandwiches, salads and cocktails.
The World End Brewpub offers pub food and beers that you can enjoy on their patio.
Sloopy’s Grill is a roadside diner that offers burgers, soft-serve ice cream, beer, and wine.
What to Pack
Good to protect your knees on longer, steeper hikes.
Definitely needed along with snow baskets if hiking in spring or early summer as there will still be snow on the trails.
Good hiking socks to keep your feet comfortable when scrambling over rocks or climbing up inclines.
Bring waterproof hiking boots that are comfortable and you have a chance to break in before you set out on long hikes.
Needed for hikes in spring or early summer as you can still find snow and ice along the trails.
Keep your hands free while having space for your sunscreen, water, extra layers, quick dry towel, and more.
Is a must as some areas are exposed and do not offer much shade.
Stay hydrated while you’re hiking in the hot sun.
A roll-up hat you can pack in your day bag to keep cool as the temperature varies throughout the day.